
How to Add Users & Give a Marketing Agency Secure Access to Locations on Google My Business in 2021
How to Add Users & Give a Marketing Agency Secure Access to Locations on Google My Business in 2021
This guide has been updated for 2021 design update on Google My Business (GMB).
With Google My Business (GMB) we have a nifty tool called Location Groups, previously known as business accounts. This provides a more secure to manage multiple users across several locations.
To create a location group within your Google My Business follow these steps listed below.
Adding Business to Location Group
Step One:
Go to Google My Business (https://business.google.com/), and sign into the Gmail account that manages the locations you are wishing to group and give access to.
Step Two:
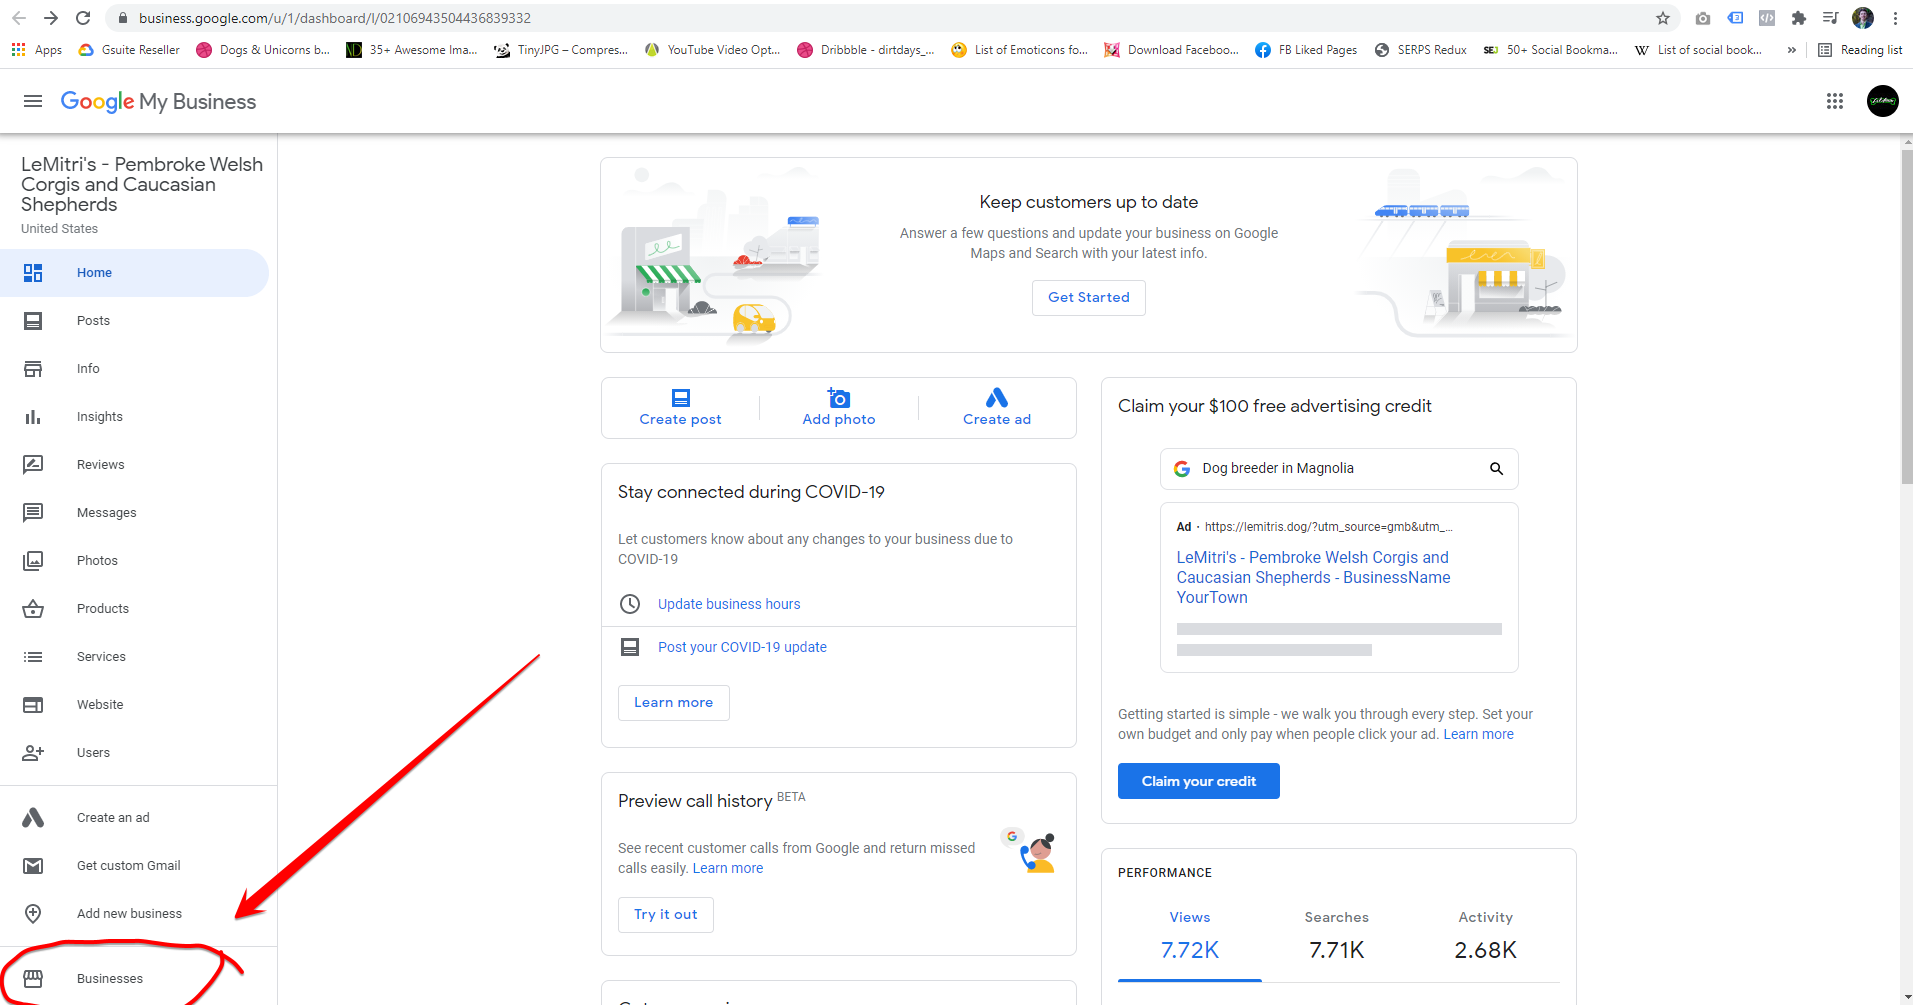
Single Location
If you have only 1 business in your Google My Business account, Go to Businesses on the left menu of your dashboard (https://business.google.com/u/1/locations):
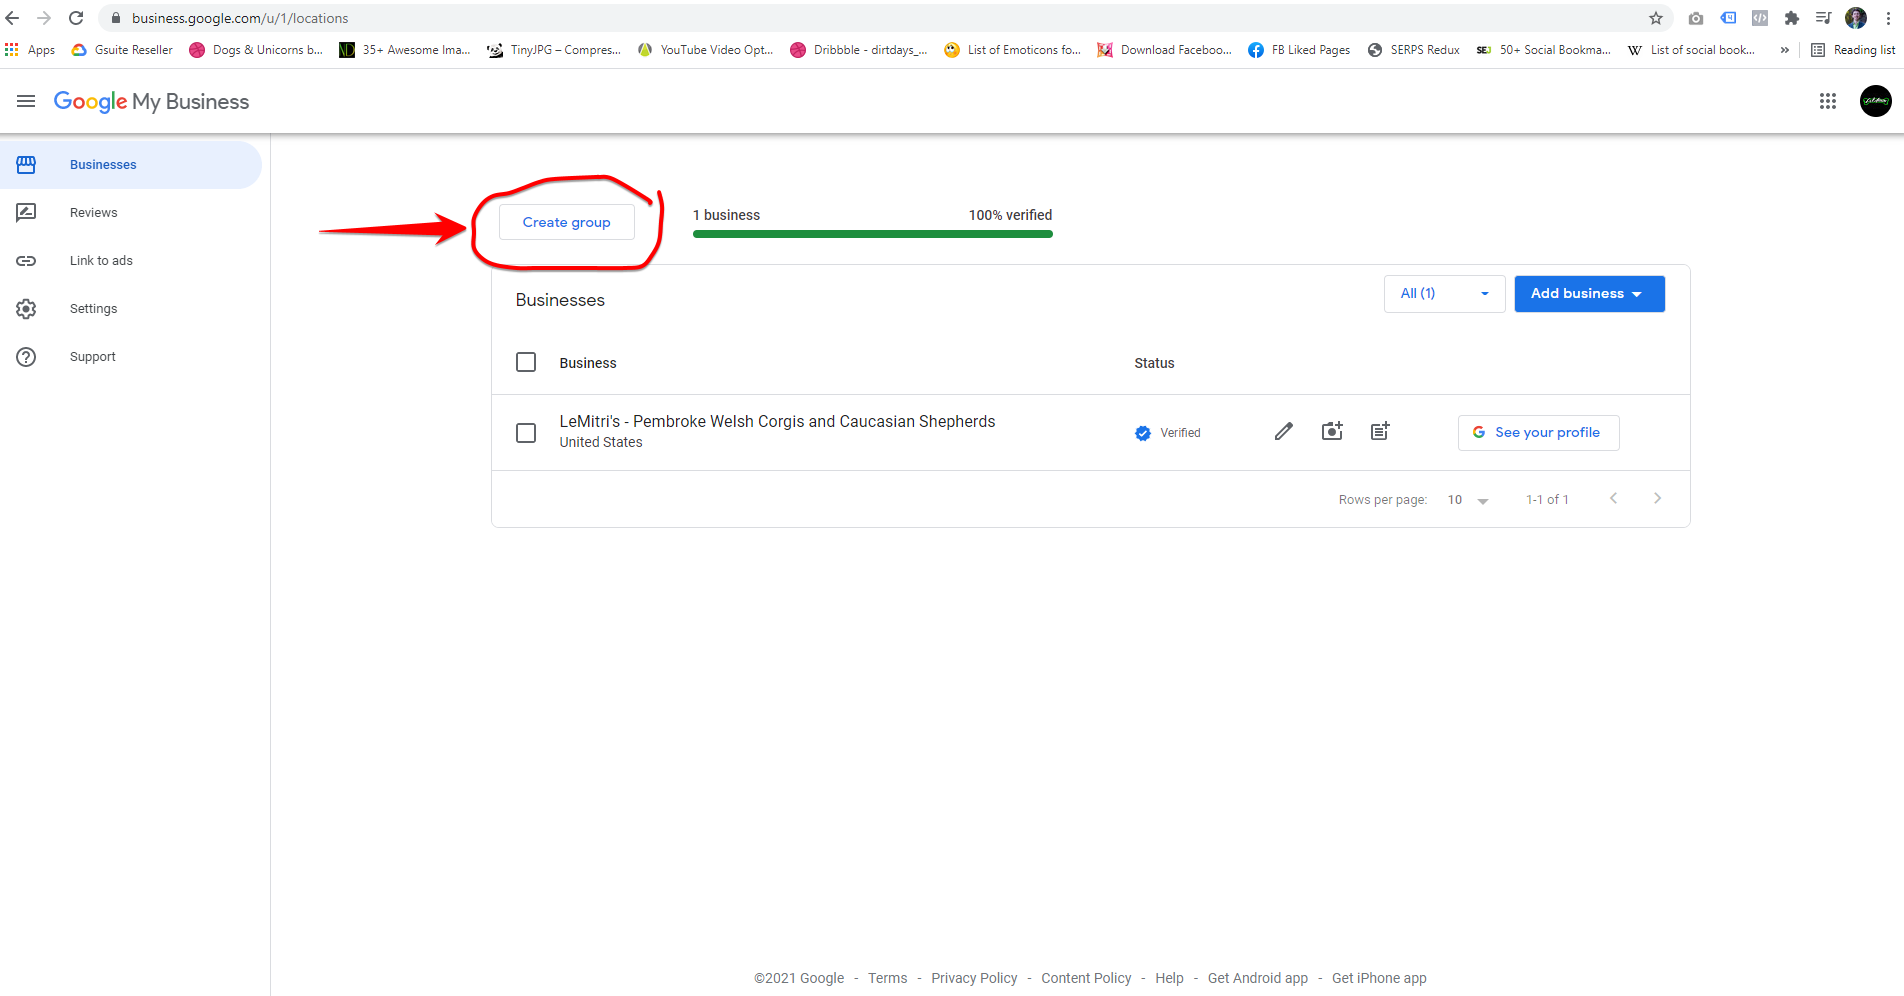
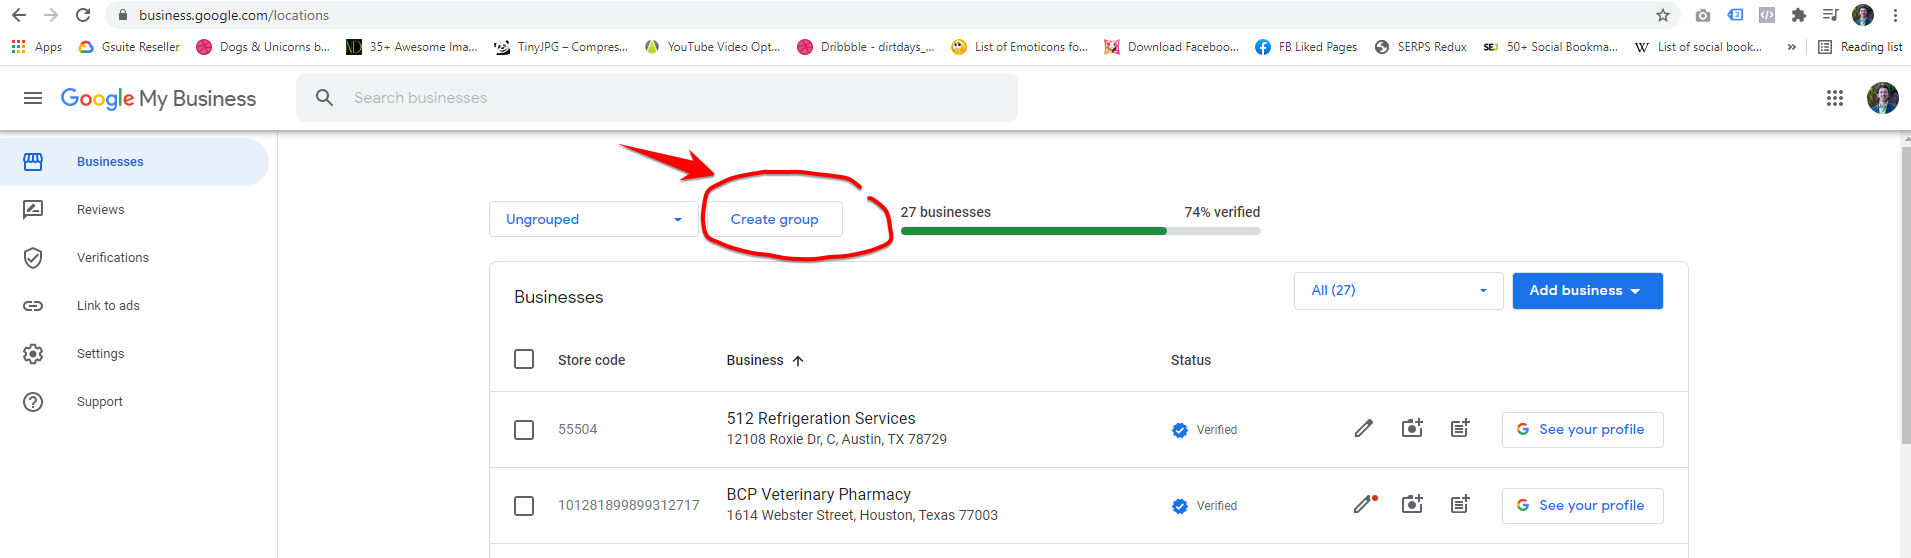
Multiple Locations
If you have multiple businesses in your Google My Business account, it will directly take you to businesses management page (https://business.google.com/u/1/locations):

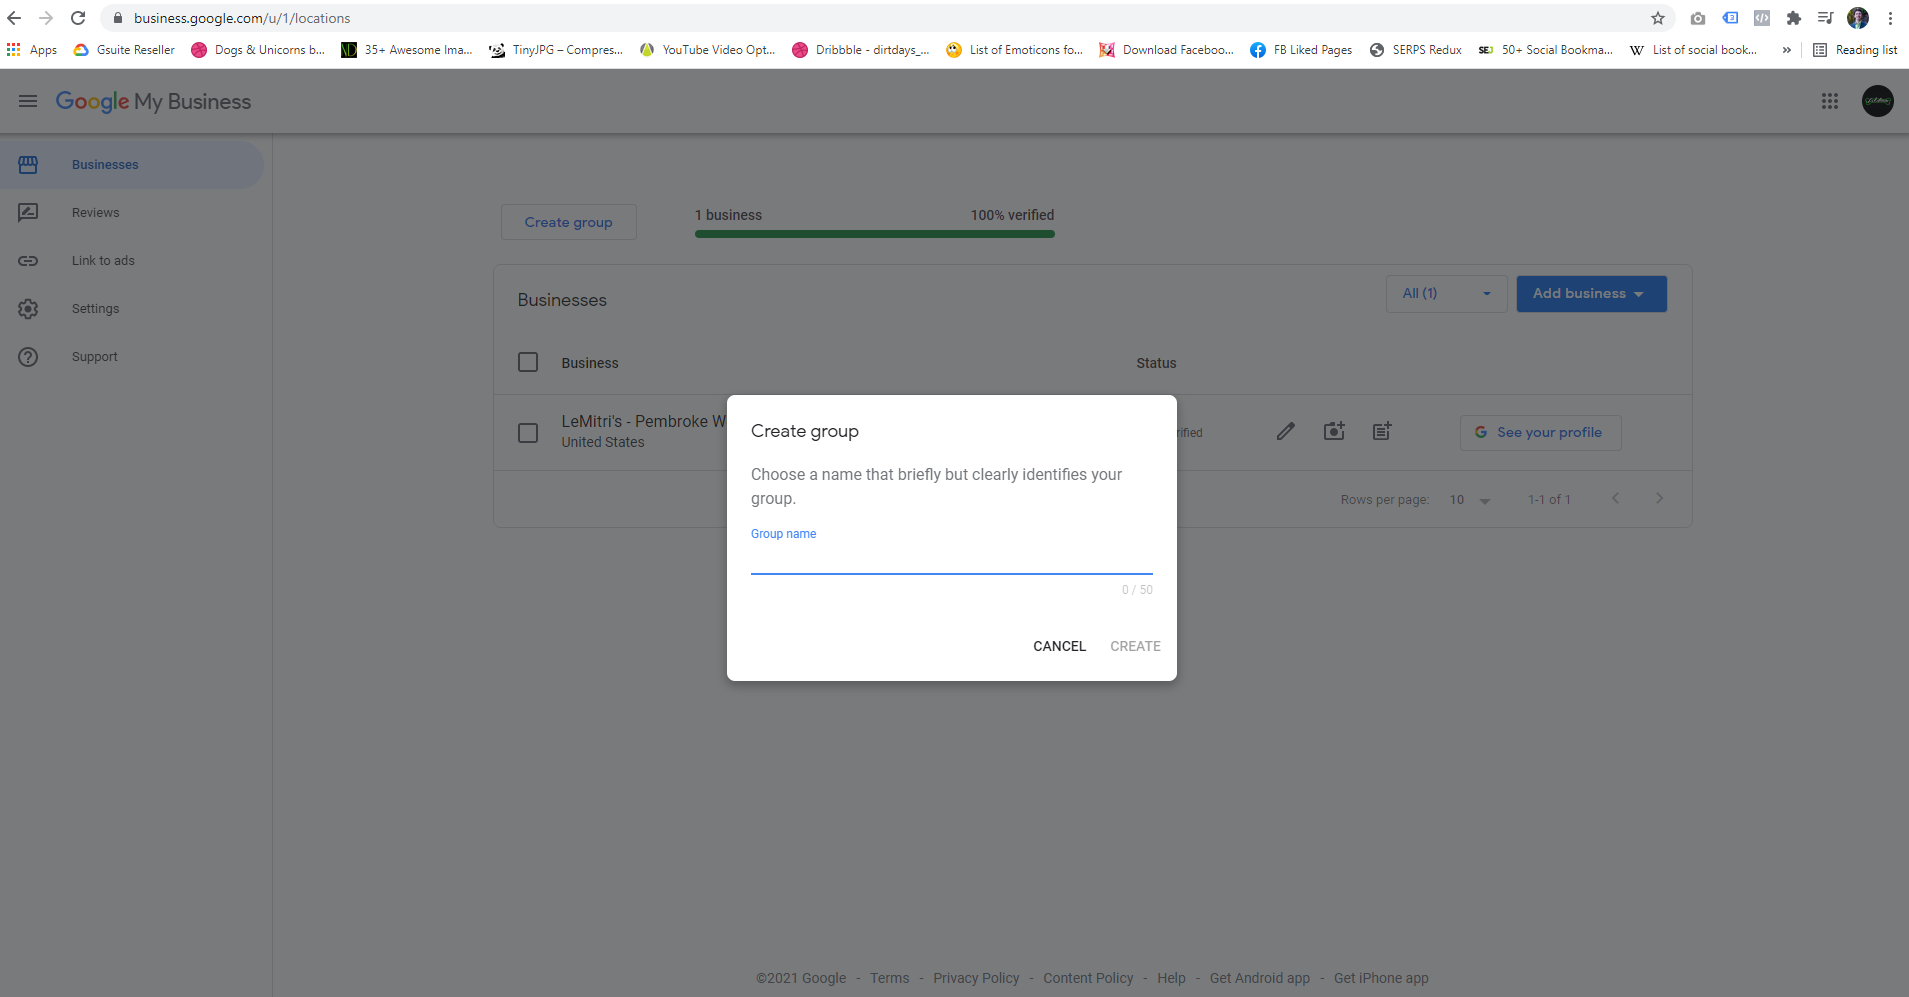
Step Three:
Click Create group.
If you have multiple businesses locations in your GMB, it will look like this, still, Click Create Group:
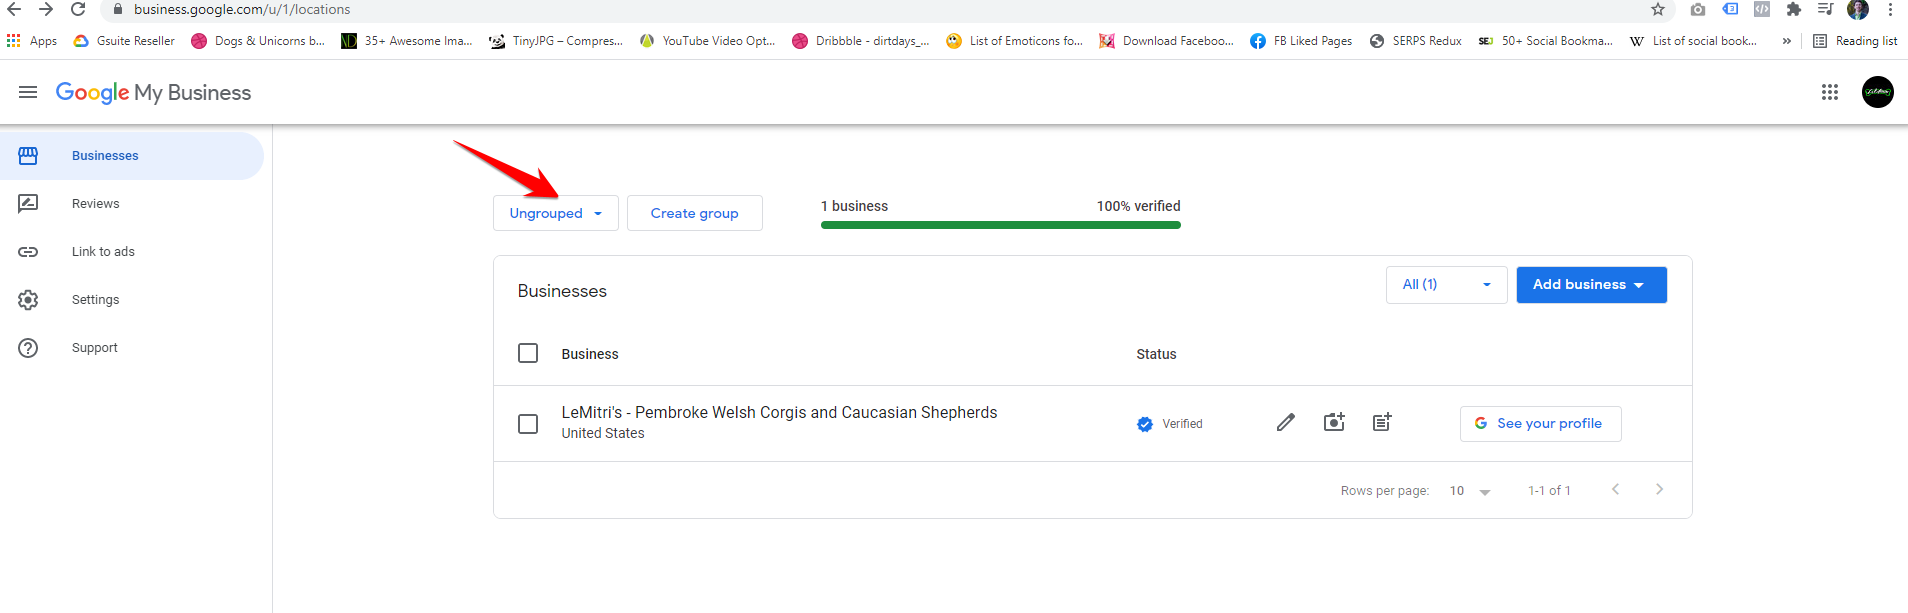
Step Four:
Appropriately name the Location group under Group name, click Create.
The location group will be created, and new dropdown with “Ungrouped” shown by default. The newly created group will be in this dropdown:
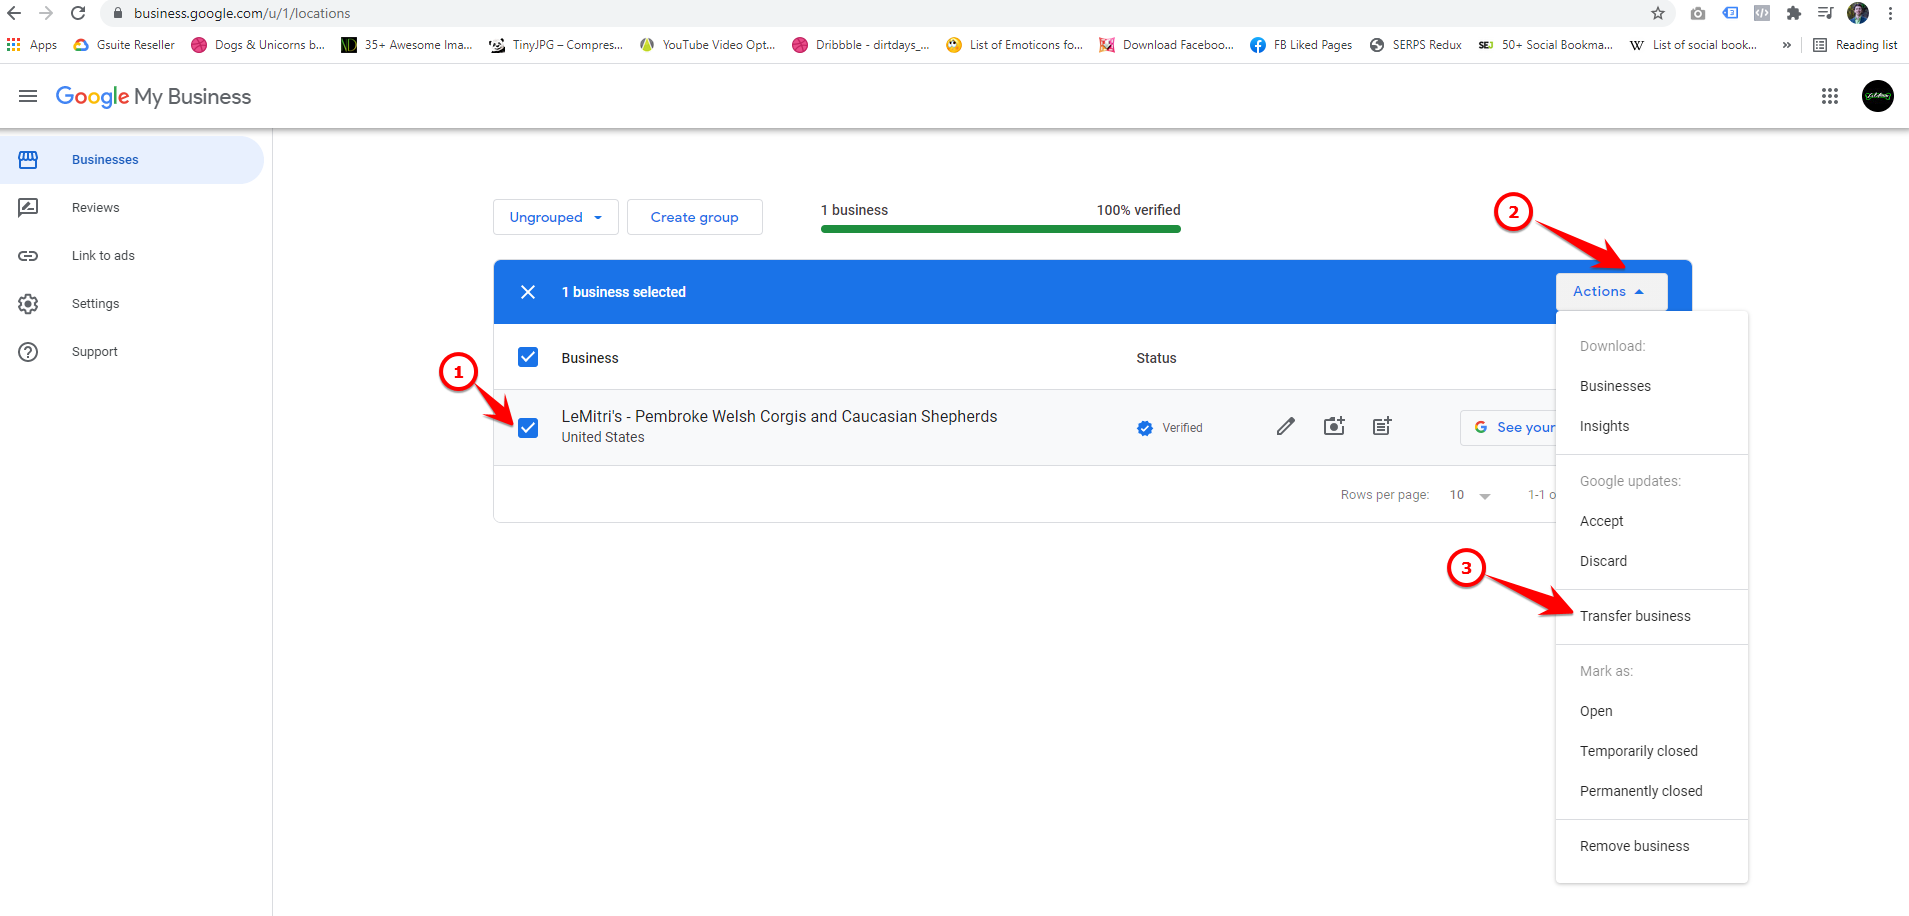
Step Five:
- Select the location that you want to add to the group;
- Click “Actions”;
- Click “Transfer business”.
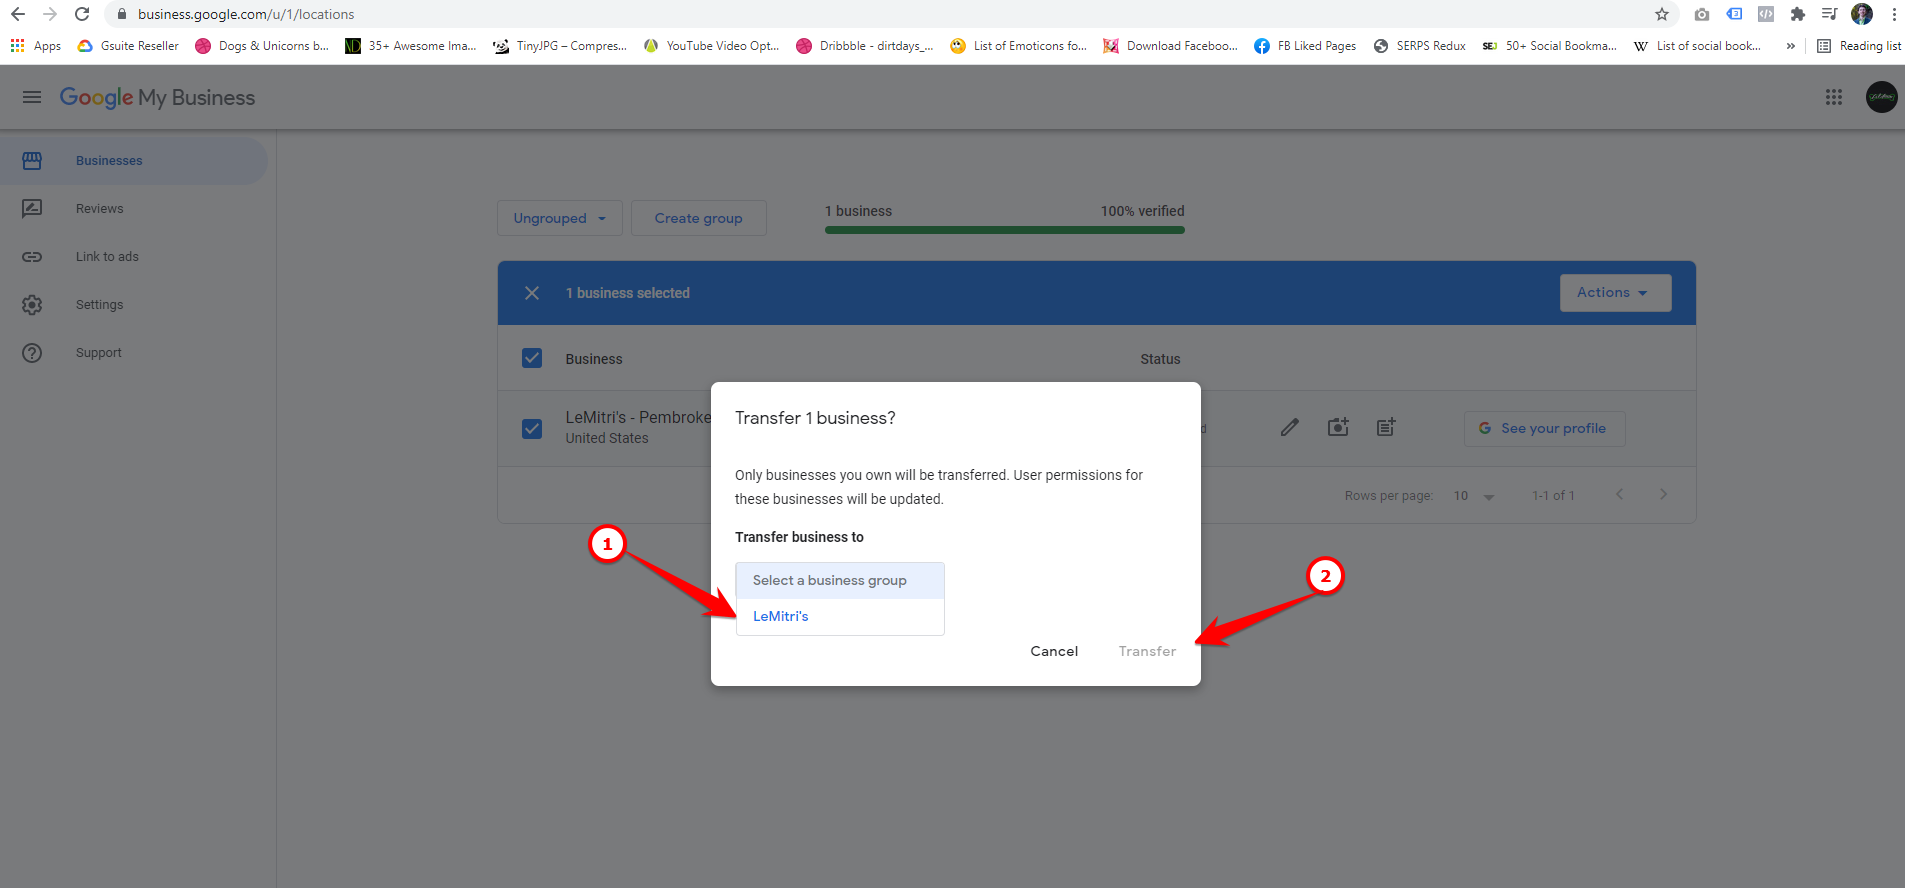
Step Six:
Select a corresponding location group that you had created and click transfer.
Step Seven:
Verify that the selected location has been placed in the correct location group by clicking Ungrouped Dropdown, and selecting the newly created group.
Adding Users/Giving Access To Your Location Group
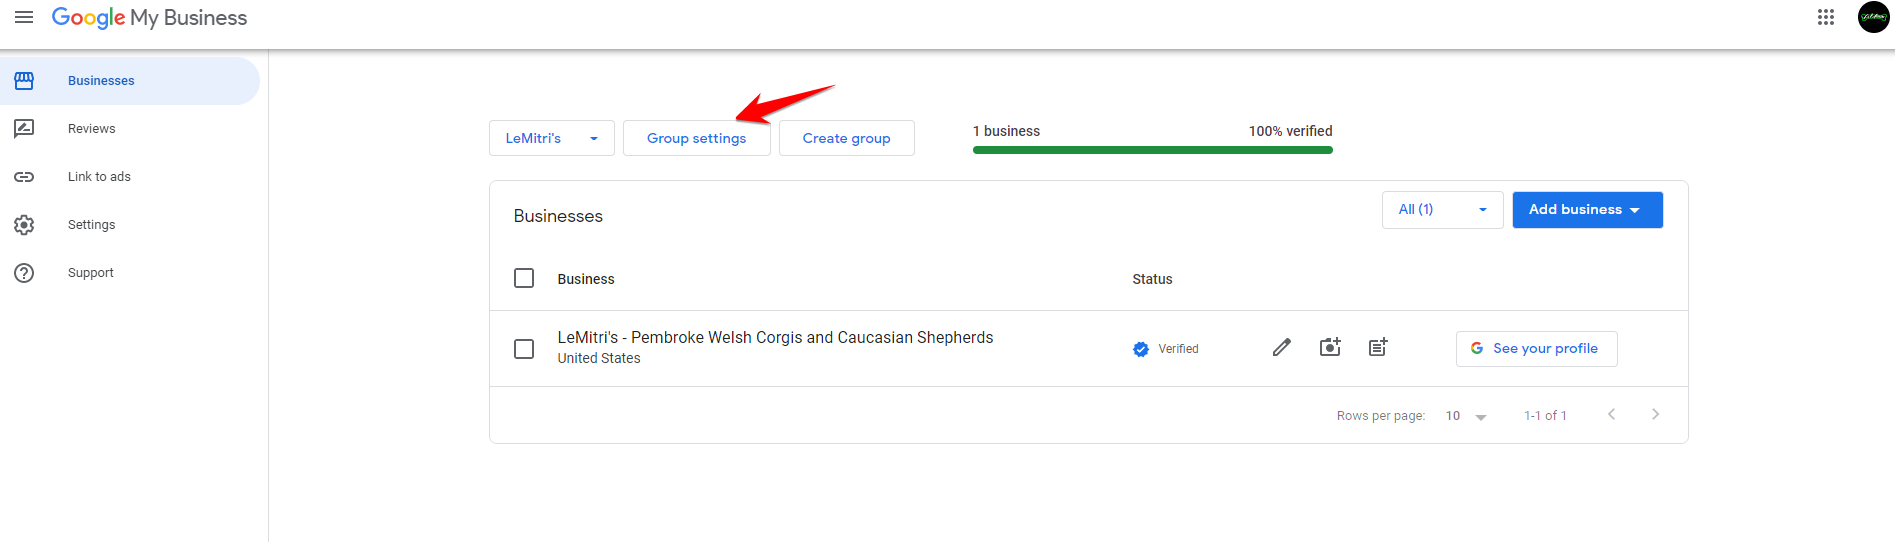
Step Eight:
Click the Group settings to go the settings the page for the new location group:
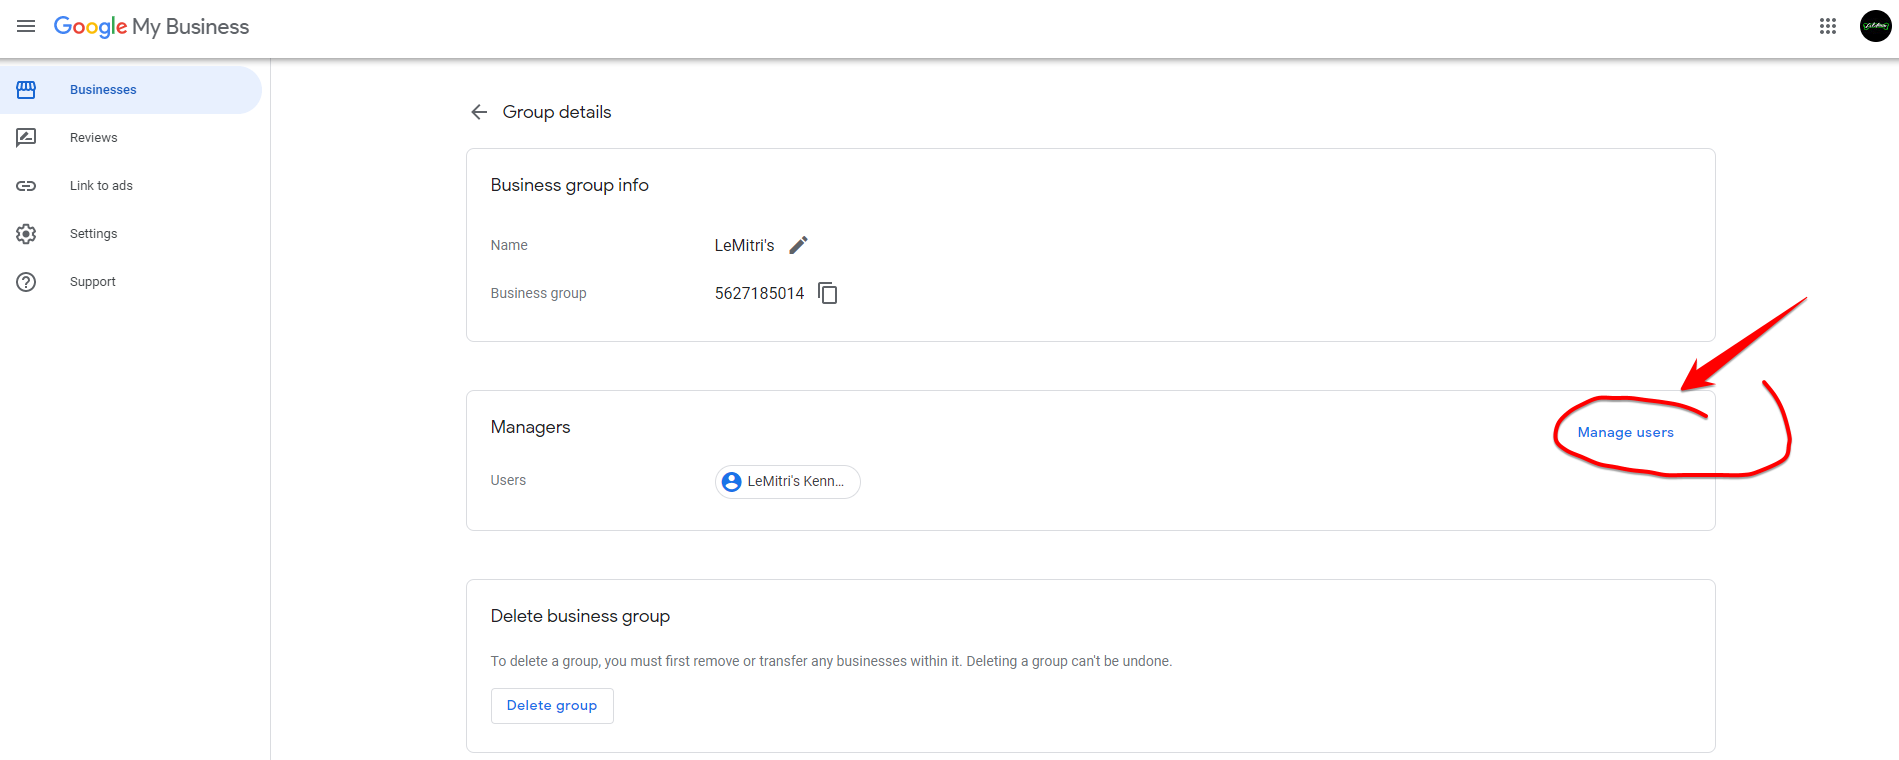
Step Nine:
Click Manage users:
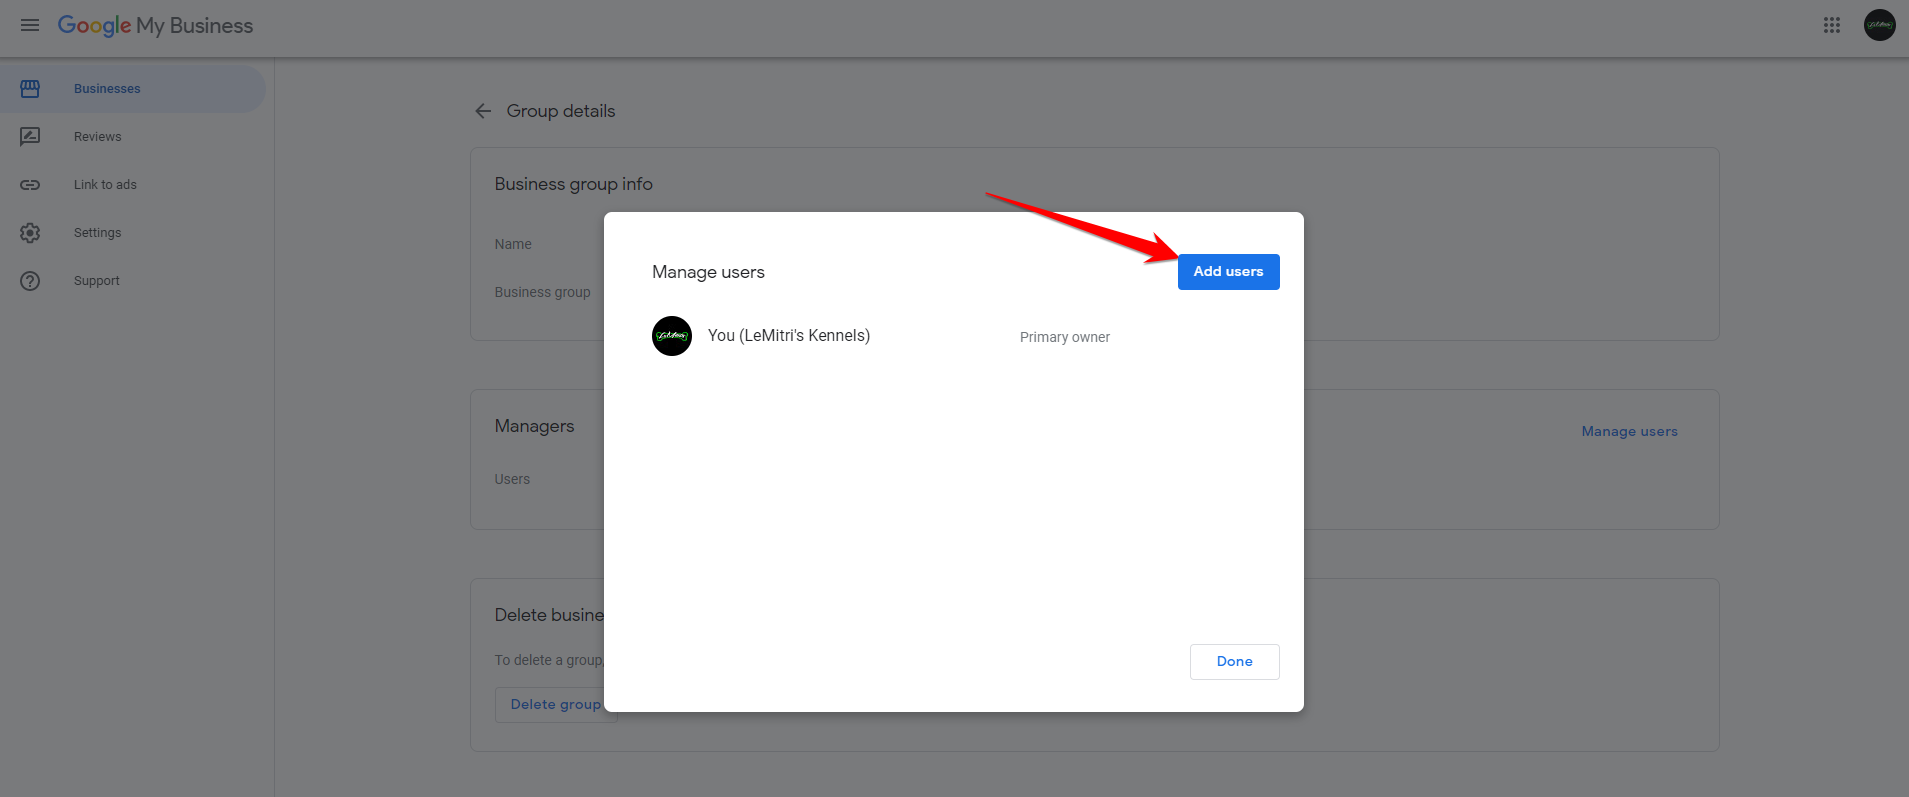
Step Ten:
Click Add users to share access to the location group, and, subsequently, to the business GMB (Google My Business) account:
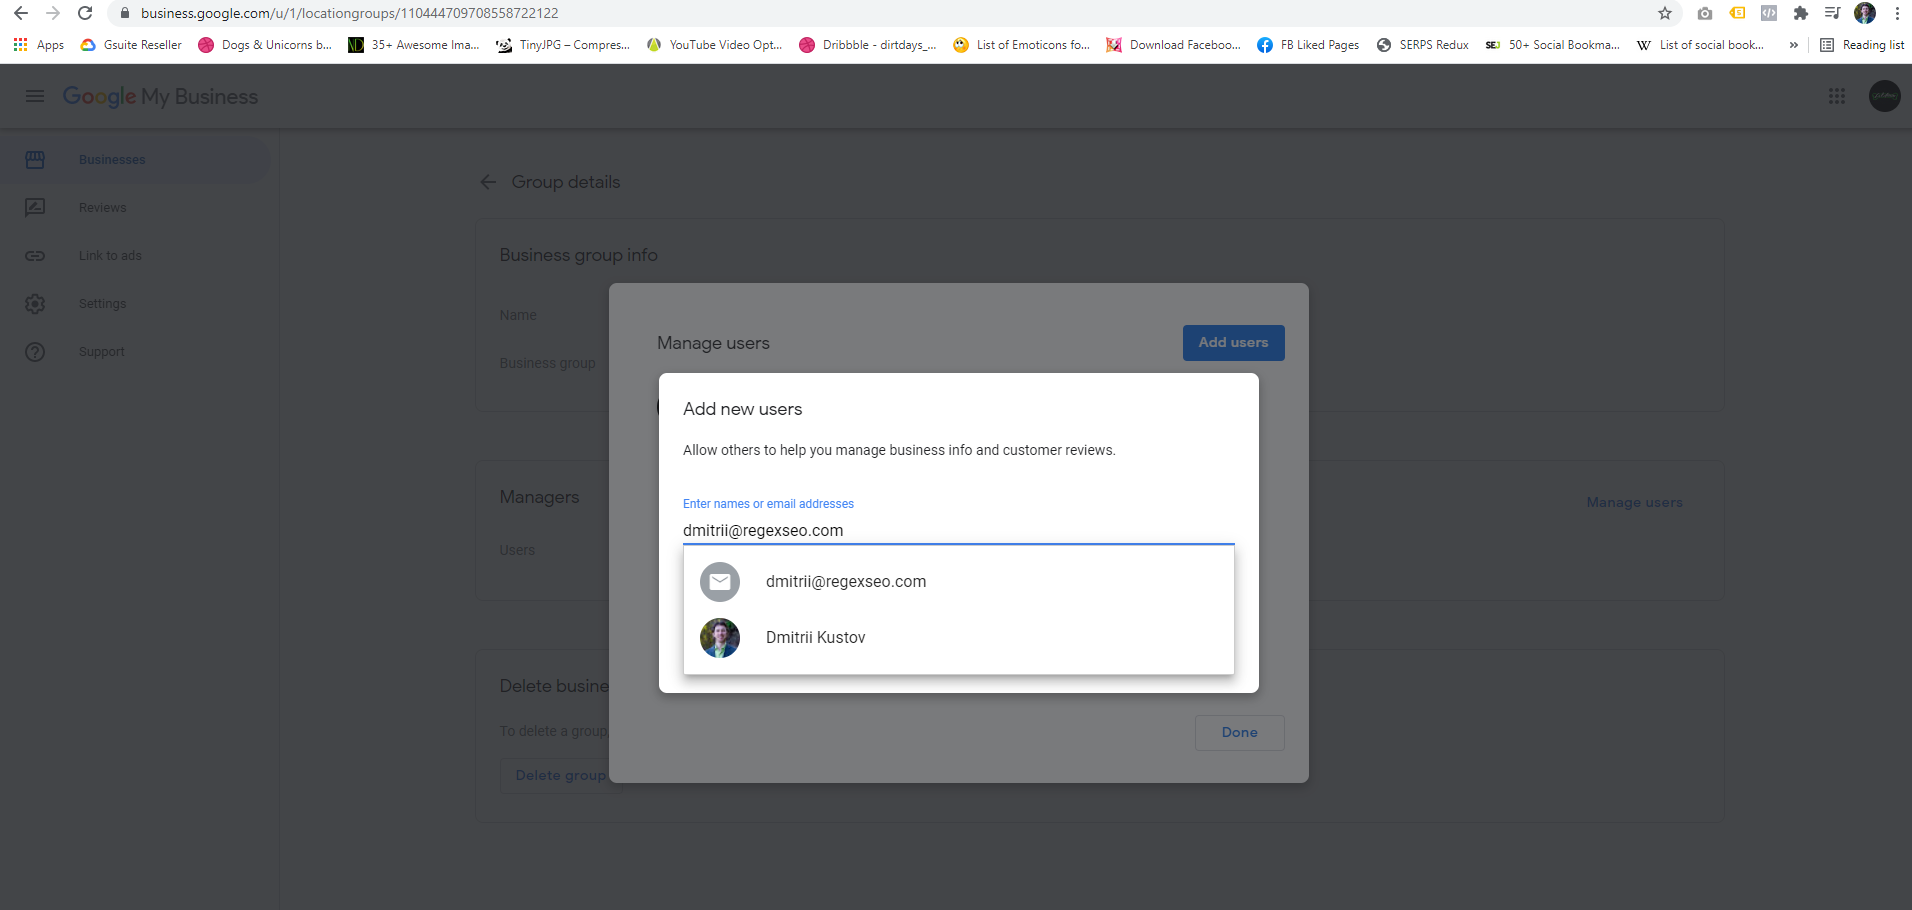
Step Eleven:
Giving access to colleagues
Simply add the email of the user you would like to add, select the user in the dropdown shown, and choose the appropriate role:
You can learn more about roles here: https://support.google.com/business/answer/6085300?authuser=1&_ga=2.87598810.358692765.1622690031-1867678829.1612827028
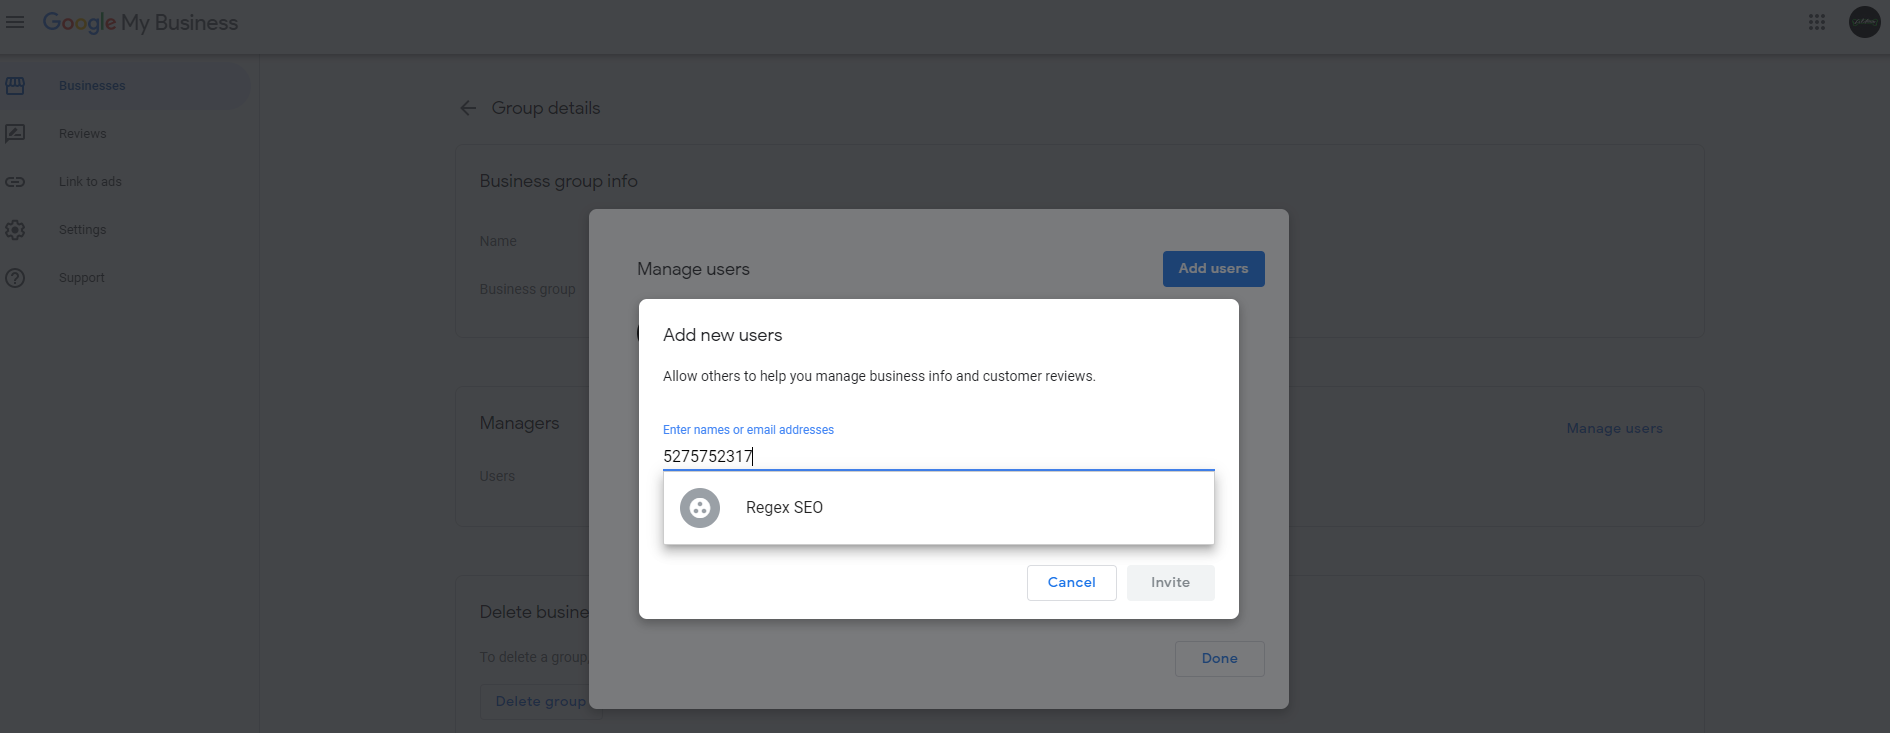
Giving access to your marketing agency
Instead of adding email, add your marketing agency‘s ID number.
Regex SEO’s ID is 5275752317.
The agency’s name will popup.
Click on it.
Select Owner for the role.
You will still be Primary Owner, and would not be able to get kicked out by another non-primary owner.
You’ve successfully granted the correct level of access to your Google My Business (GMB) locations! 👏
If you have any questions, put them in the comments below!
Regex SEO \ Internet Marketing Director


June 16, 2021
Should be done now.